How to the use Deepseek AI model API
This guide walks you through the complete process of using the Deepseek AI model API, including topping up your balance, generating an API key, and integrating it with the Ozeki AI Server to build intelligent, real-time communication solutions.
What is Deepseek AI?
Deepseek AI is a high-performance artificial intelligence system that enables real-time communication using technologies like speech recognition, natural language processing, and speech synthesis. By combining various AI models - such as speech-to-text, text-to-speech, and conversational AI - Deepseek AI powers smart, automated interactions for platforms like voice calls, chatbots, and messaging applications.
How to Top up Deepseek AI API platform (Quick Steps)
- Open the Deepseek AI API platform
- Click on the "Top Up" menu
- Choose the amount
- Select a payment method
- Fill in your card and billing details
- Complete the payment
How to generate Deepseek AI API key (Quick Steps)
- Log in to your Deepseek AI account
- Open the "API Key" menu
- Click "Create New API Key"
- Enter a name
- Click "Generate"
- Copy the generated API key
How to use Deepseek AI in Ozeki AI Server (Quick Steps)
- Open the Ozeki AI Server
- Go to the "AI Models" section
- Select "ChatGPT"
- Paste the API key
- Go to "AI Bots"
- Assign the ChatGPT model
- Start the conversation
How to Top up Deepseek AI API platform (Video tutorial)
In this video tutorial, you will learn how to add funds to your Deepseek AI API platform, ensuring you have sufficient credit to access the AI services. The tutorial will guide you through selecting the top-up menu, choosing the desired amount, providing payment details, and confirming the transaction.
Step 1 - Open API platform
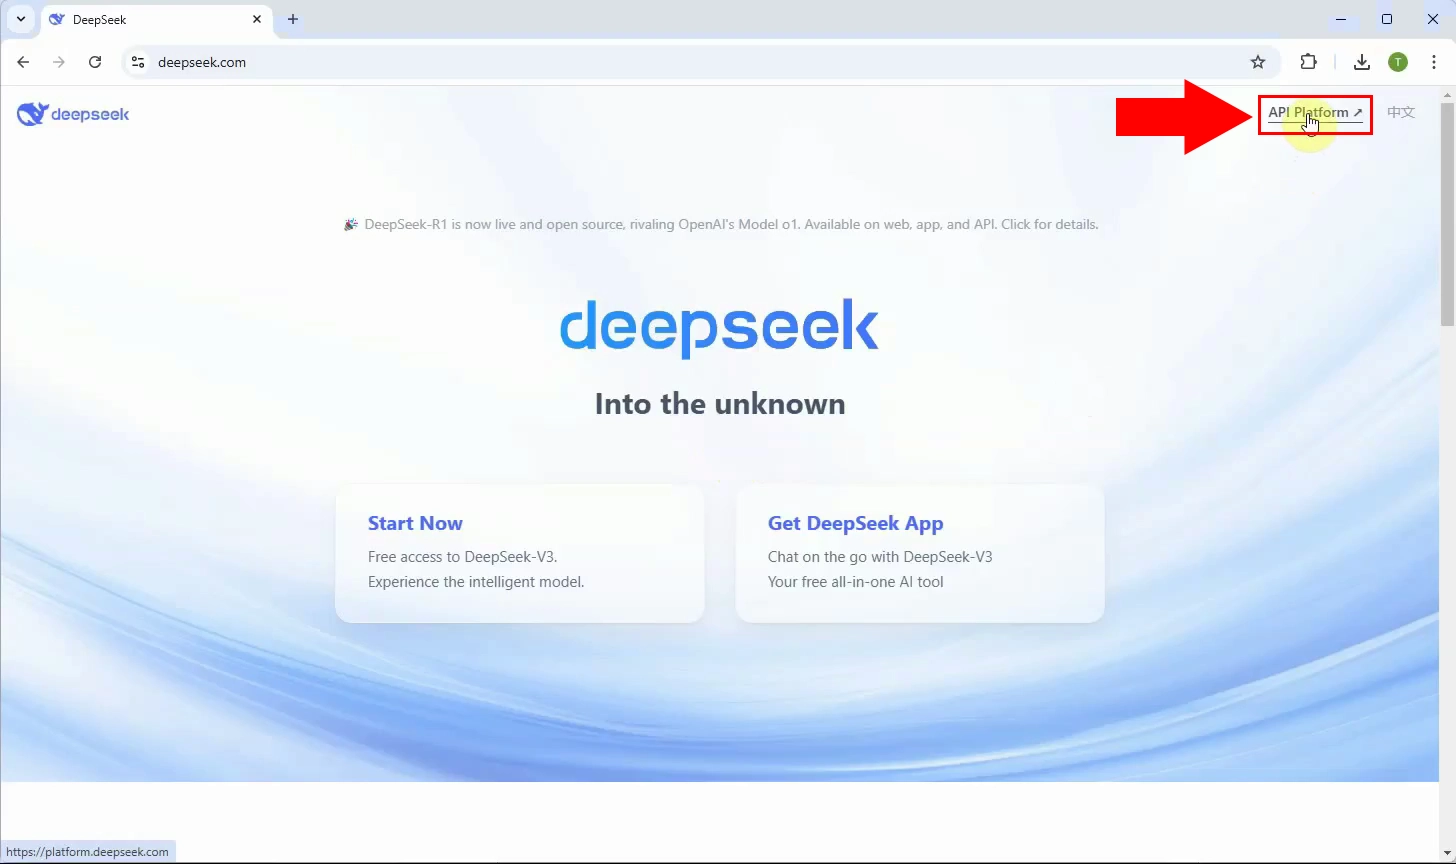
Access the Deepseek AI API platform through your web browser to begin the top-up process (Figure 1).
Step 2 - Select Top up menu
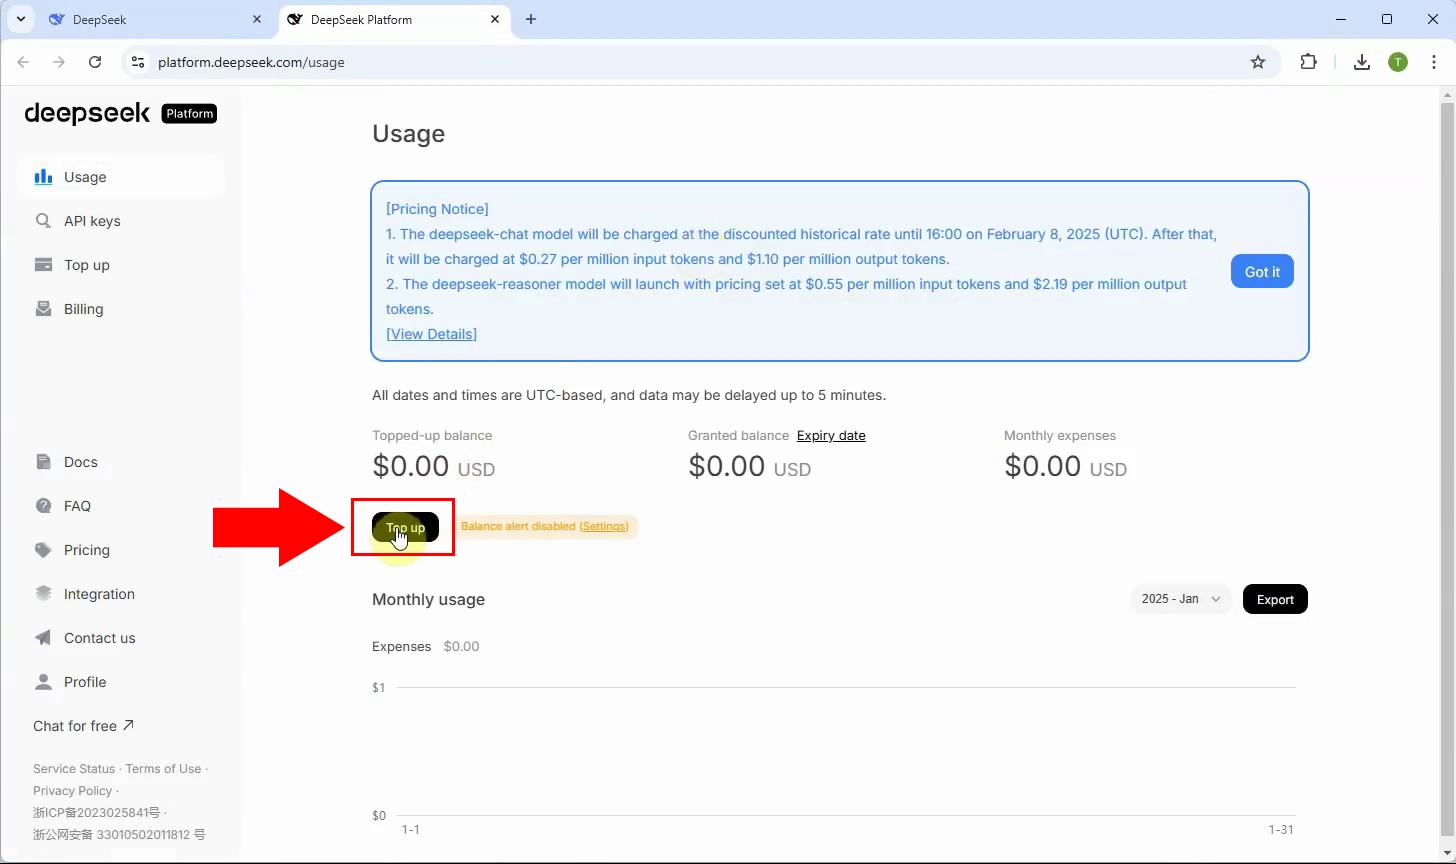
Click on the "Top Up" option to begin the payment process (Figure 2).
Step 3 - Select amount of Top up
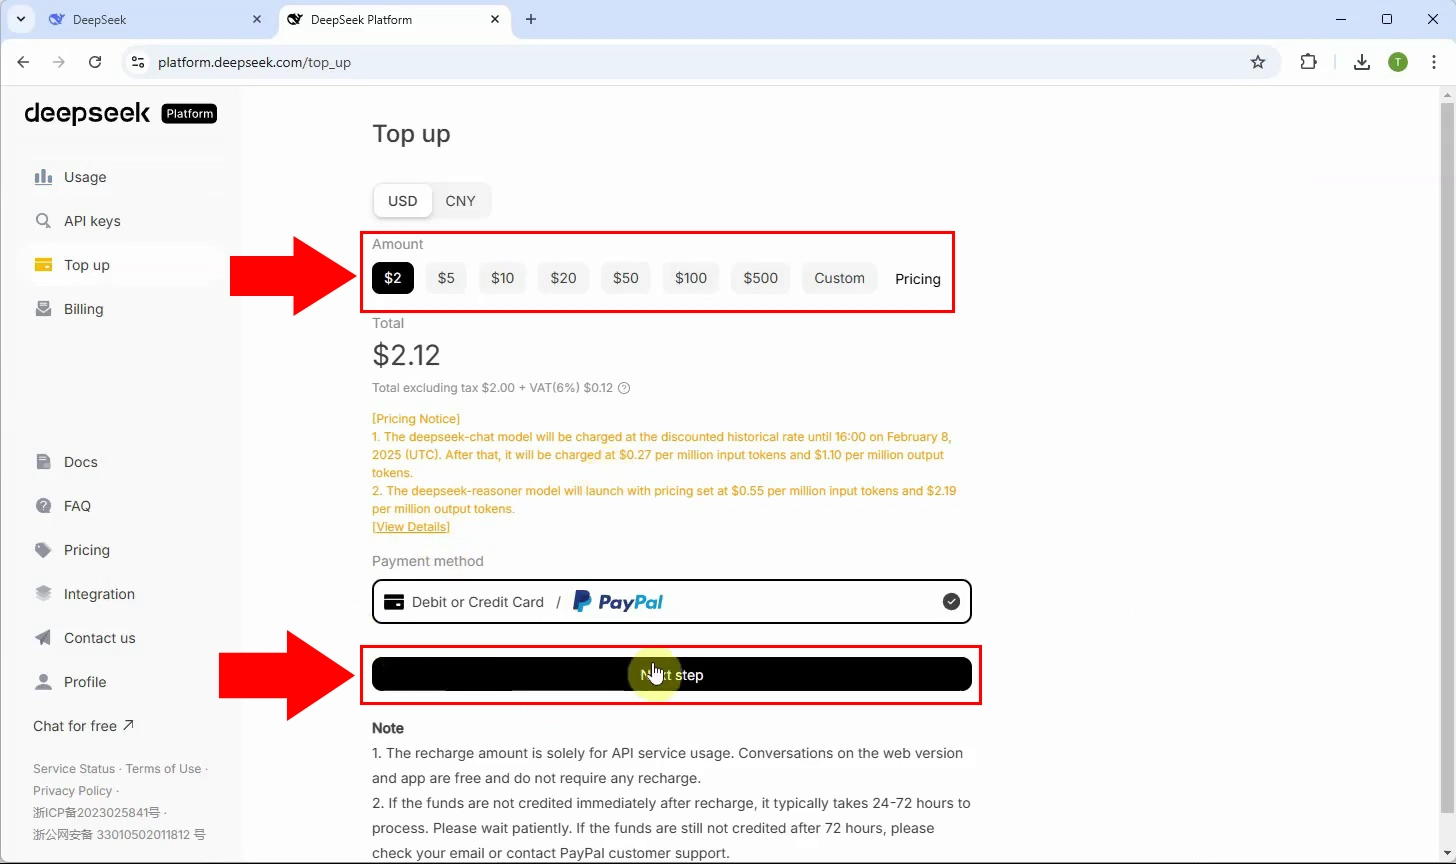
Choose how much credit you want to add to your account. You may have options such as preset amounts or a custom value (Figure 3).
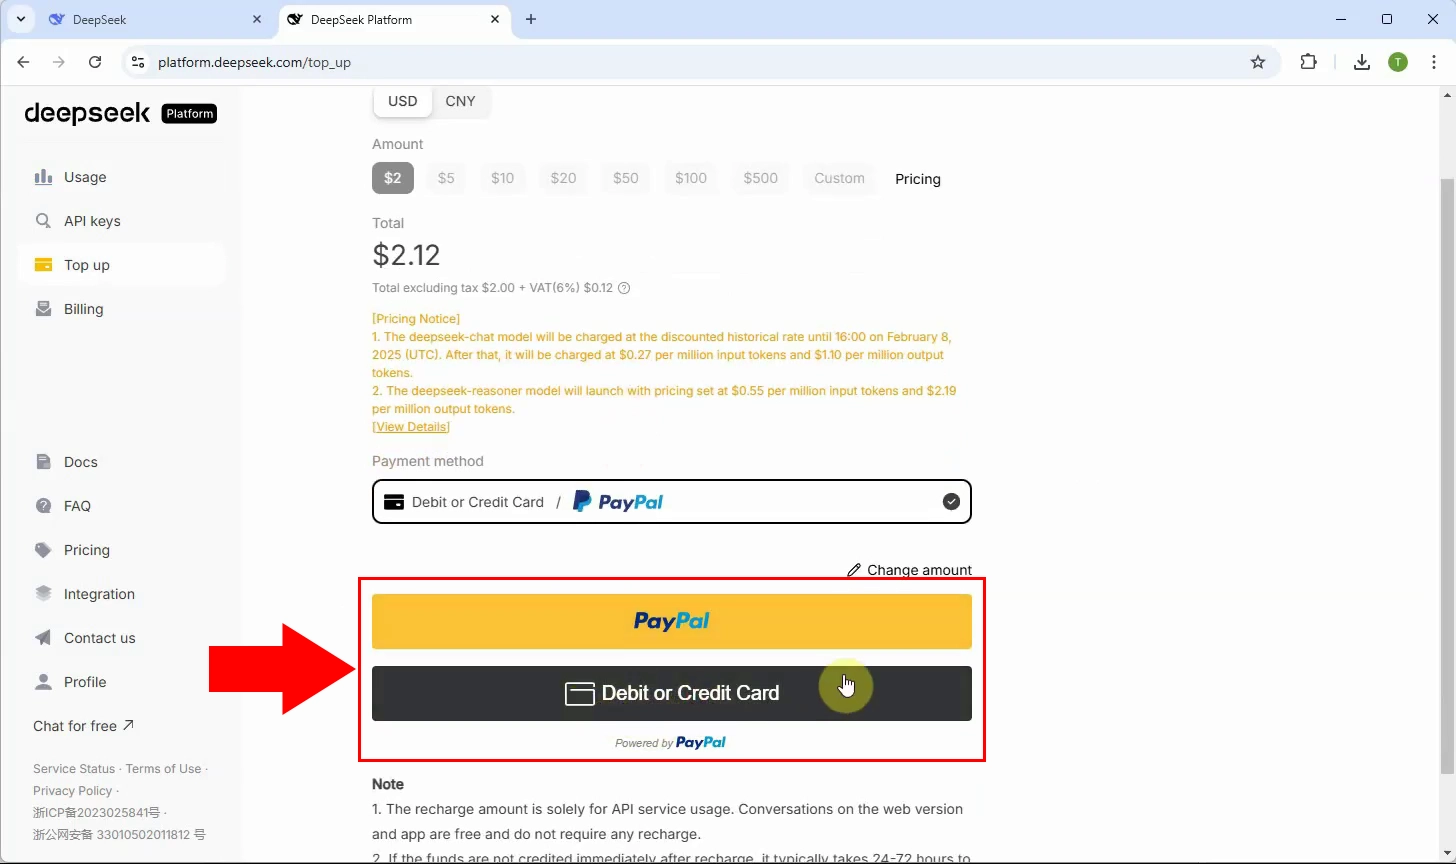
Step 4 - Select payment method
Select your preferred payment method, such as credit/debit card or another supported option, to proceed with the transaction (Figure 4).
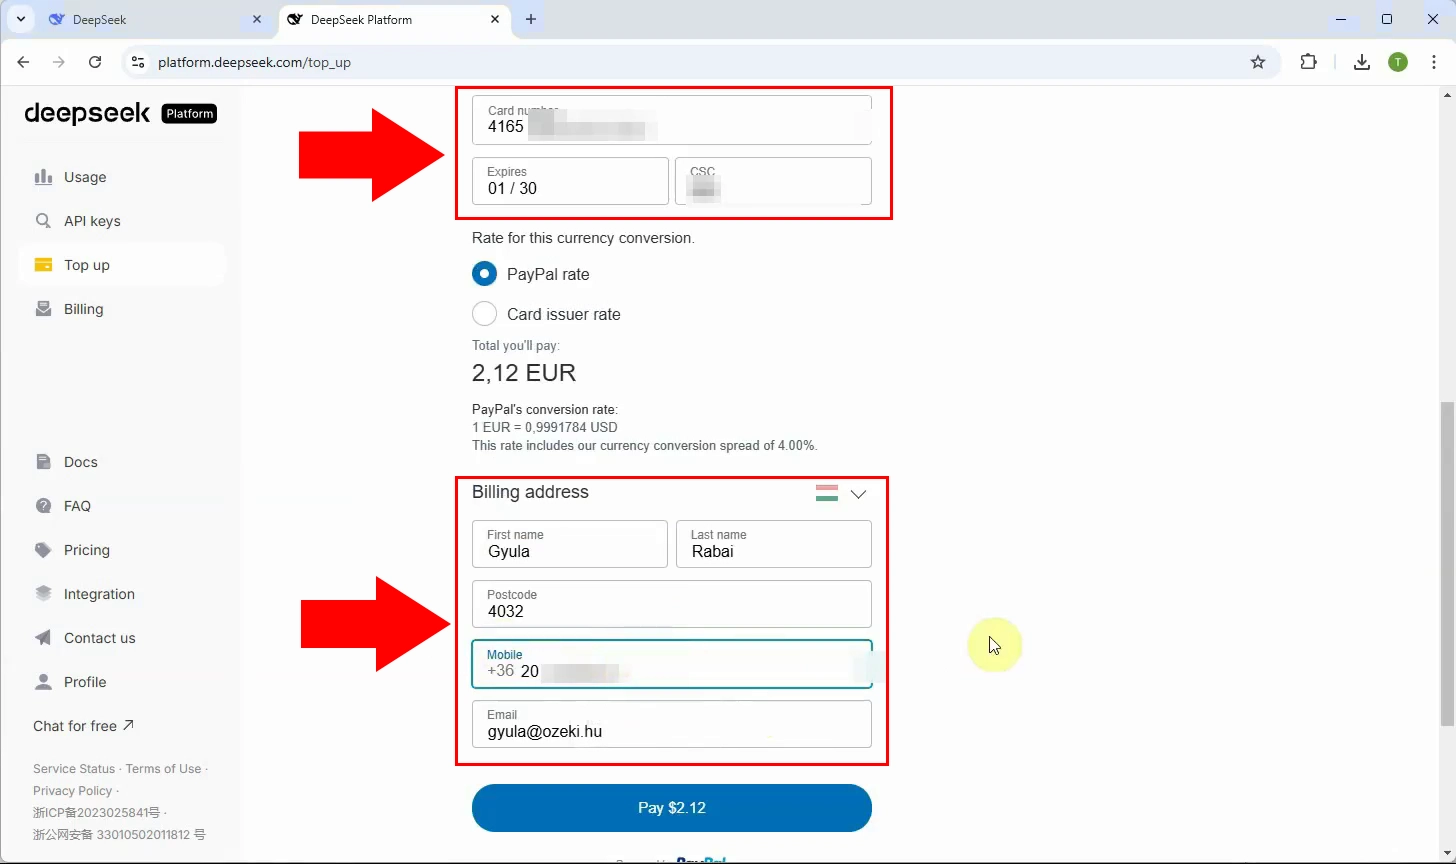
Step 5 - Fill card and billing details
Enter your card number, expiry date, CVV, and billing information. Double-check the details to ensure everything is accurate (Figure 5).
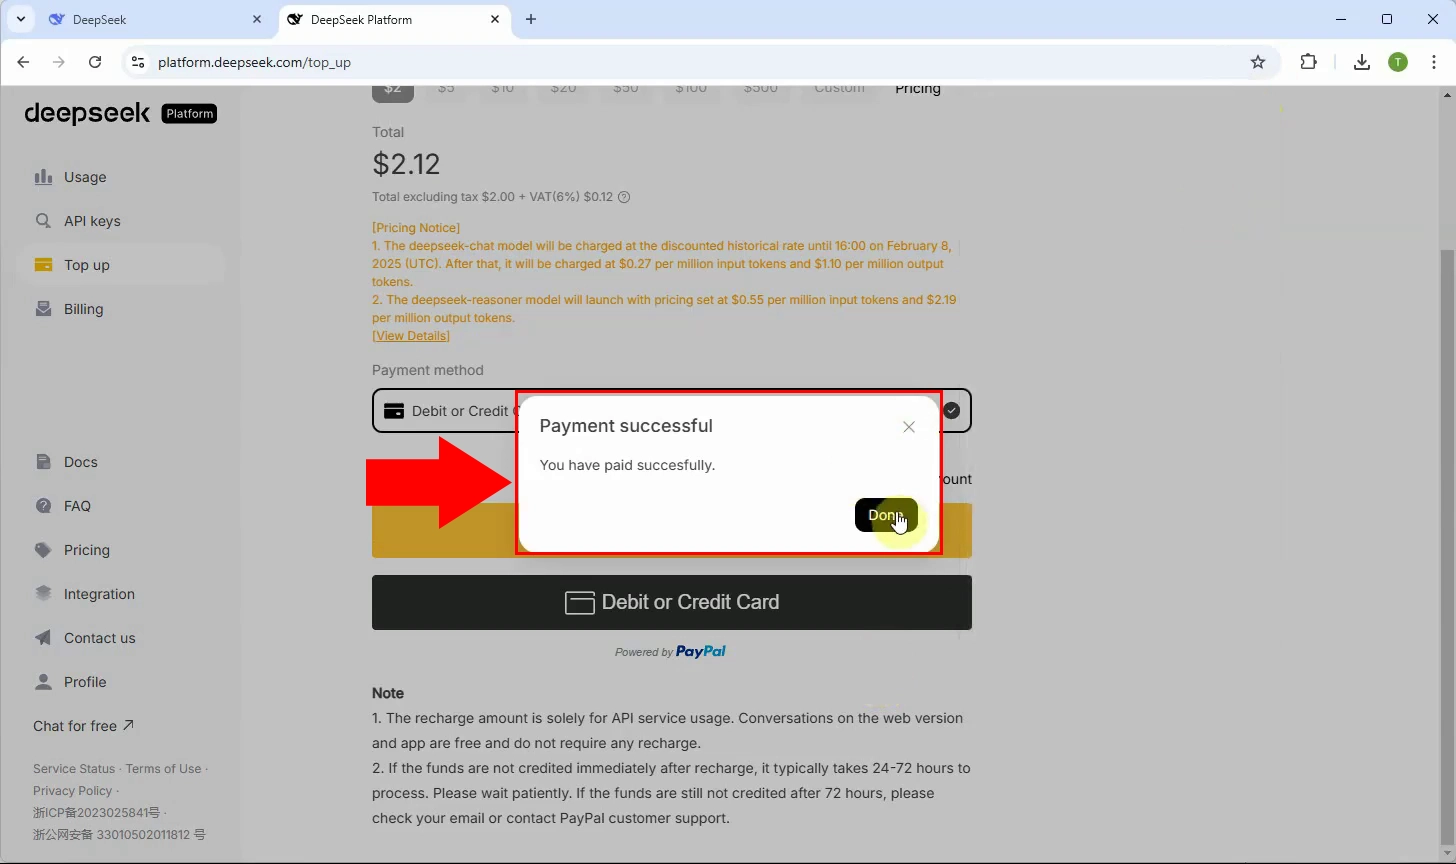
Step 6 - Payment successfull
Once the payment is processed, you’ll see a confirmation that your balance has been successfully topped up and is ready for use (Figure 6).
How to generate Deepseek AI API key (Video tutorial)
This video tutorial shows you how to generate a secure API key, which will allow the Ozeki AI Server to communicate with Deepseek AI.
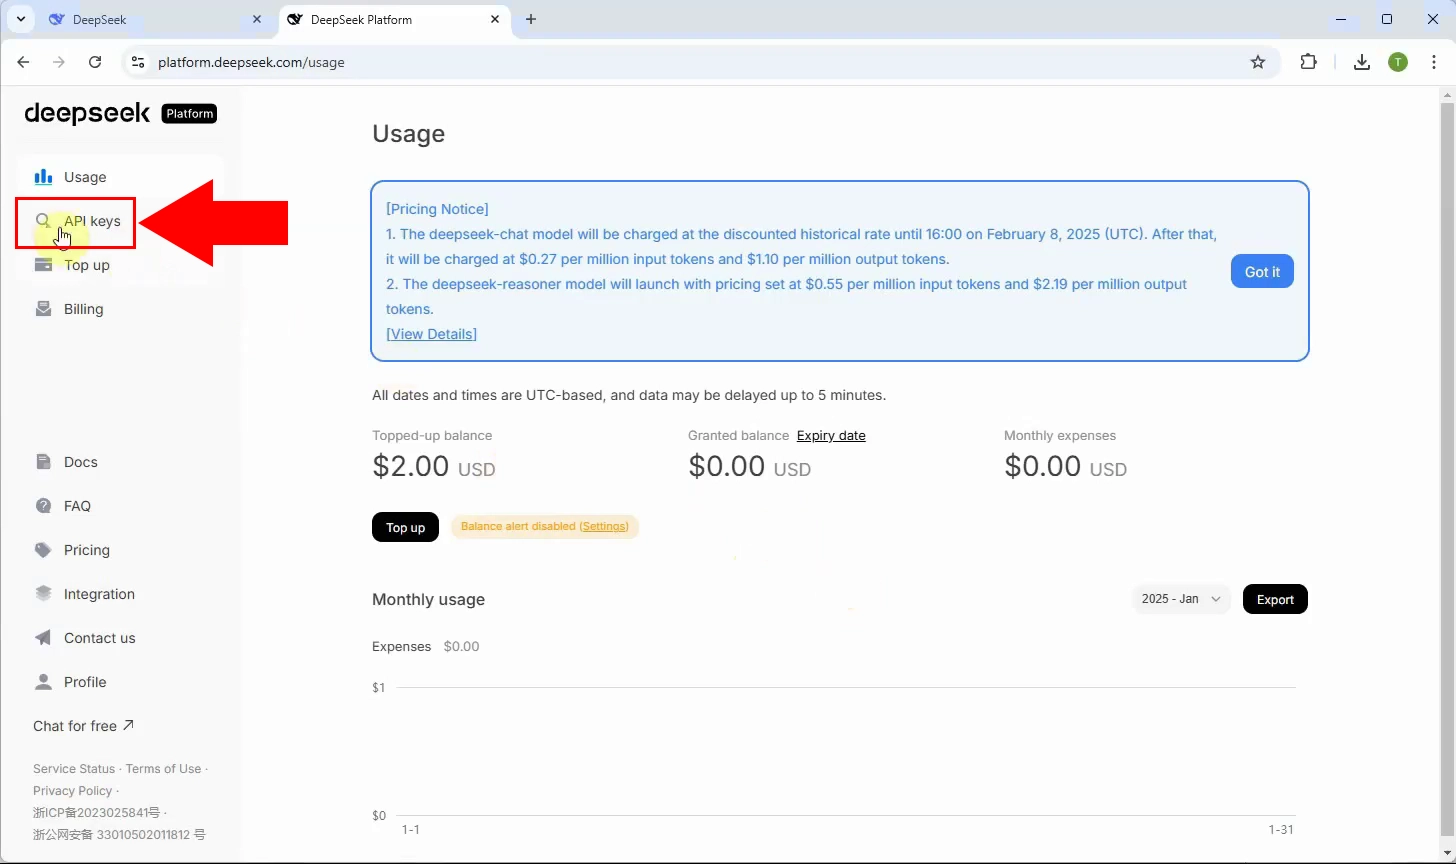
Step 7 - Open API key menu
In the menu bar on the left, select "API keys" and click on it to go to the other page where you can generate an API key (Figure 7).
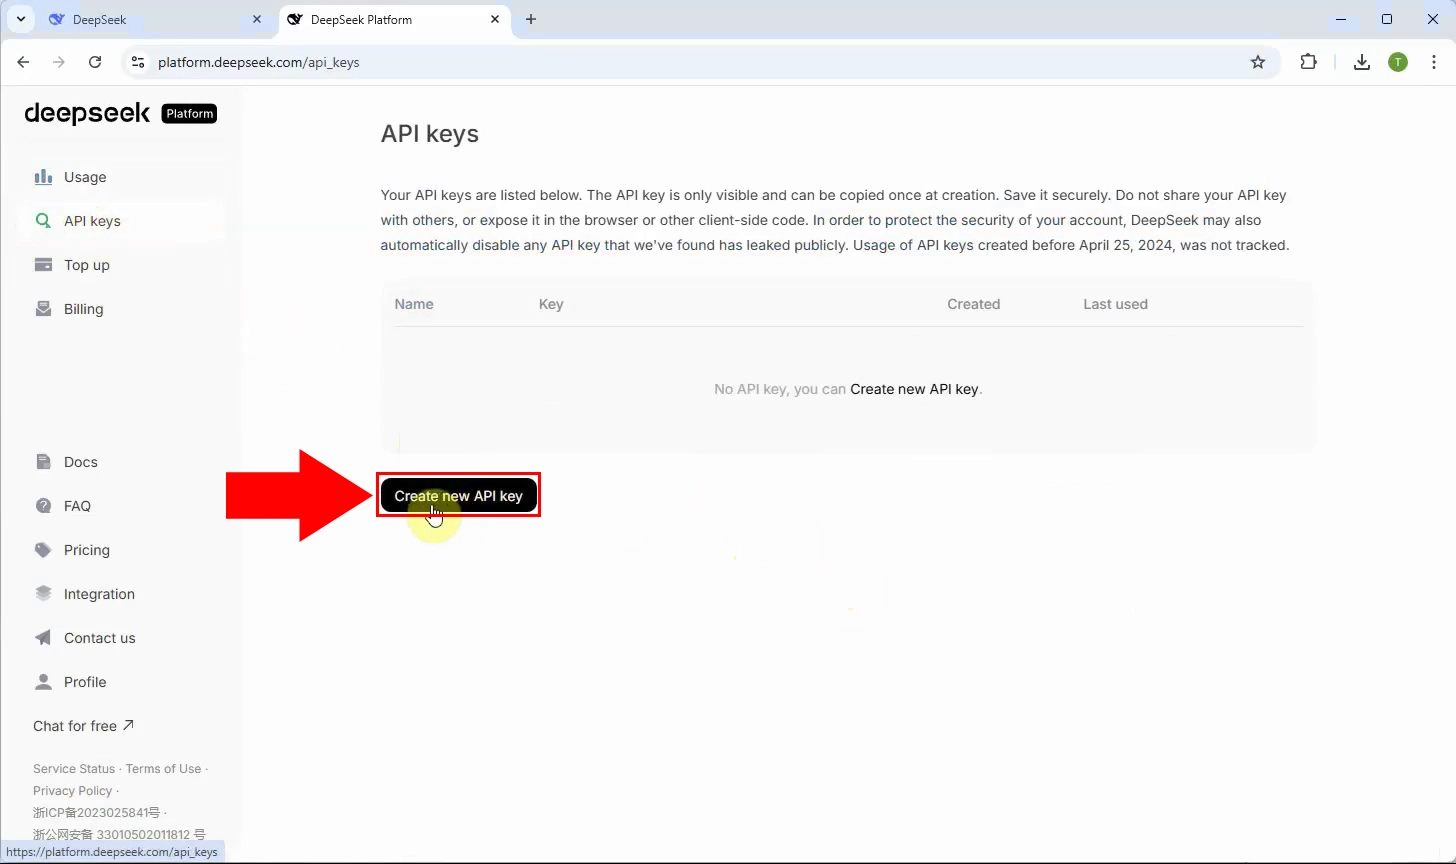
Step 8 - Create new API key
Click on the "Create new API key" button. This will open a form for defining a new access key (Figure 8).
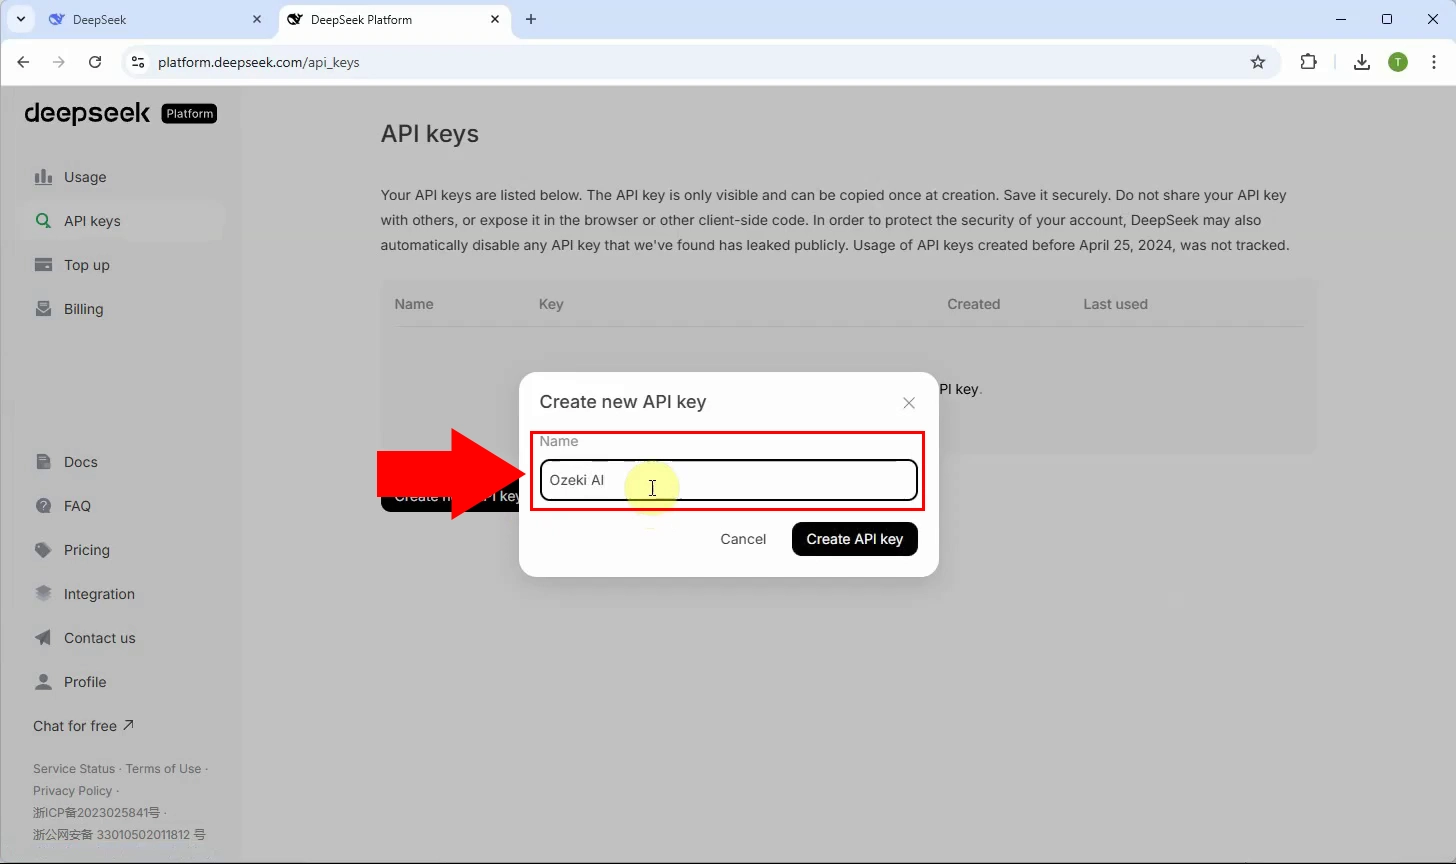
Step 9 - Define API key name
Provide a unique and descriptive name for your API key - for example, "Ozeki AI" - to identify it later (Figure 9).
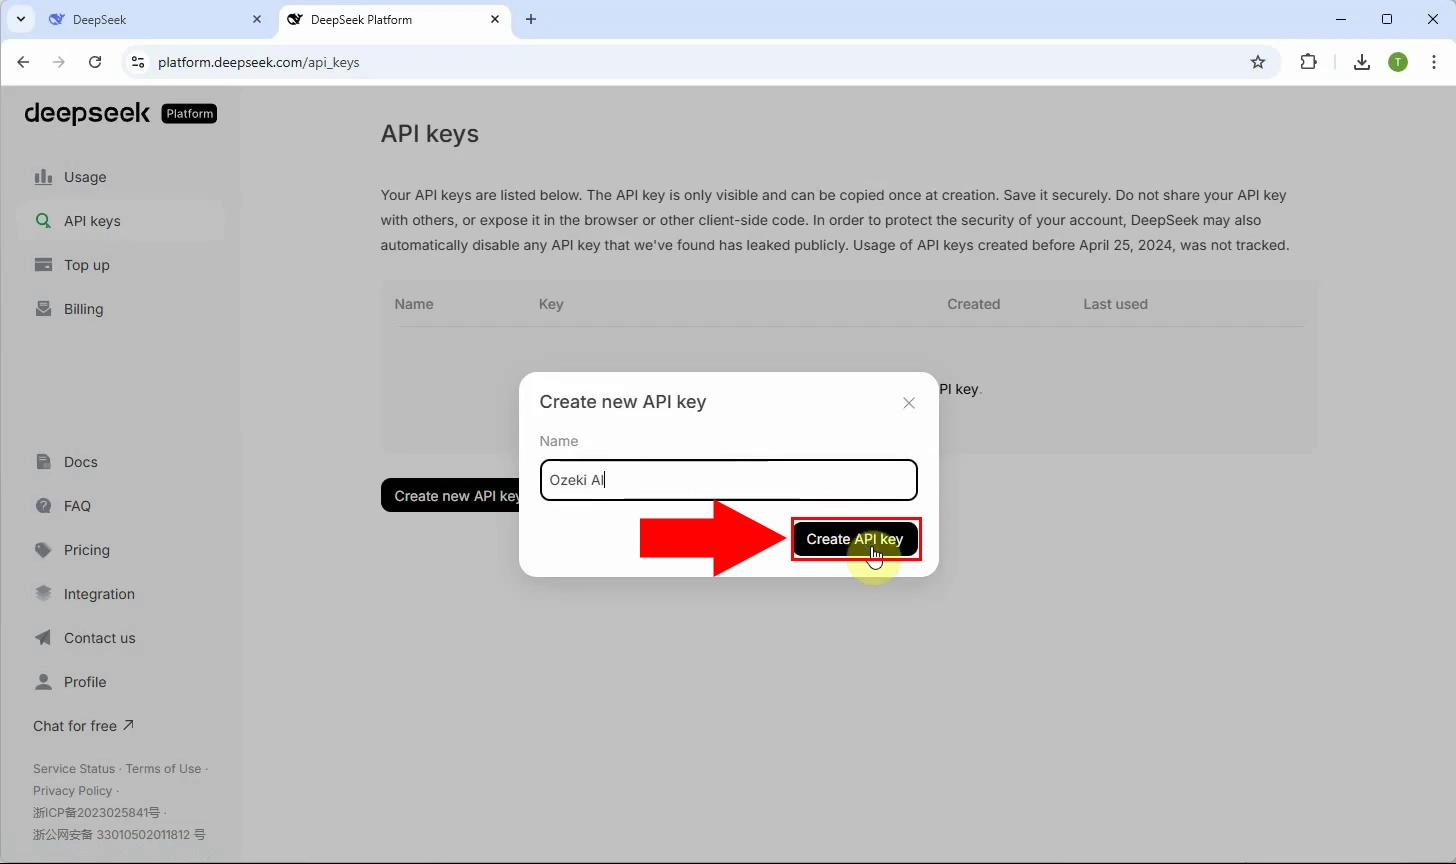
Step 10 - Generate API key
Click the "Create API key" button to create your API key. The system will assign a unique string that grants access to the API (Figure 10).
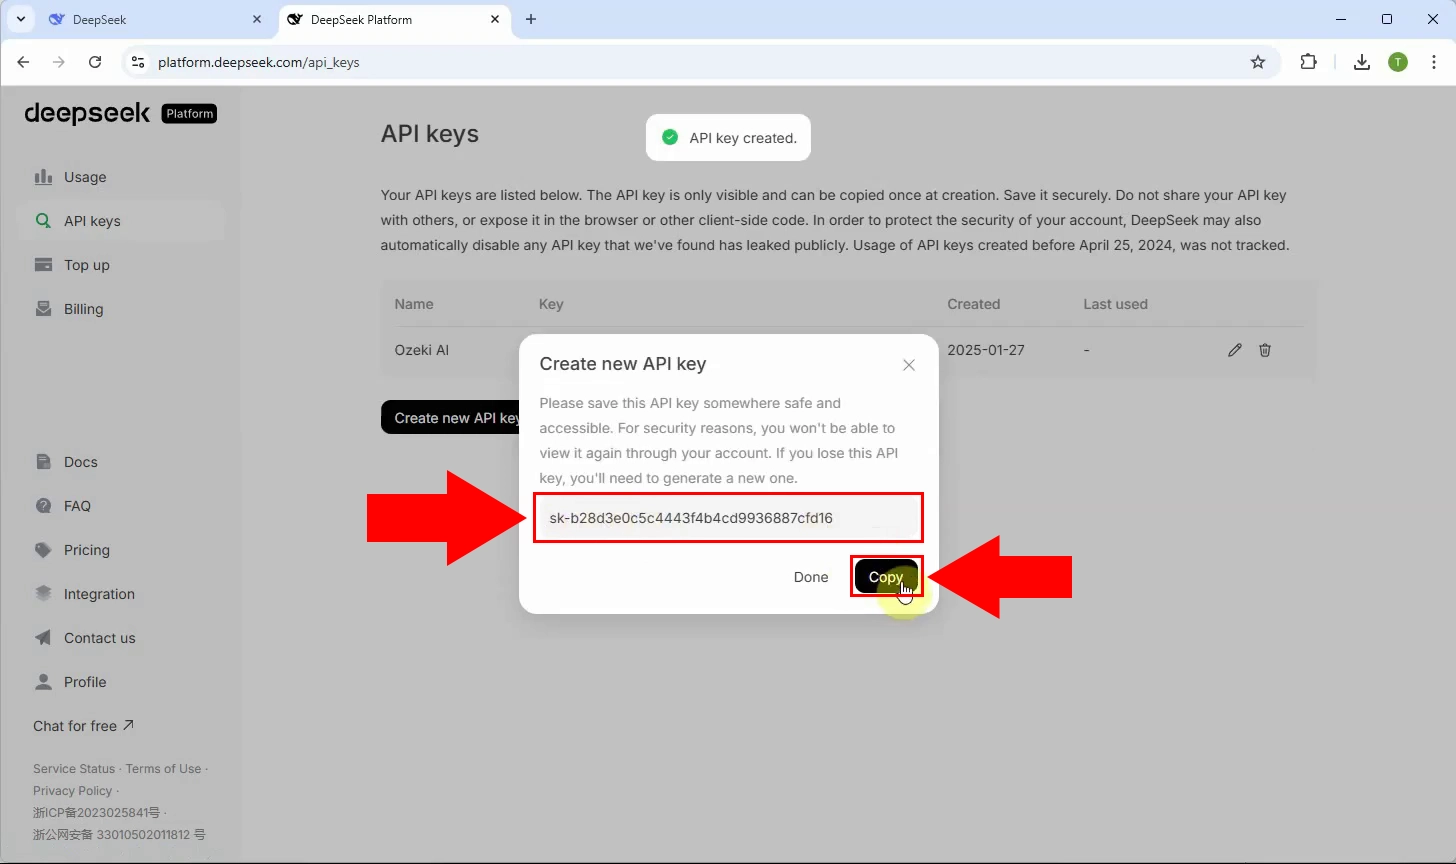
Step 11 - Copy API key
Once generated, copy the API key immediately and store it in a secure location. You’ll need this key to configure the Ozeki AI Server (Figure 11).
How to use Deepseek AI in Ozeki AI Server (Video tutorial)
This tutorial guides you through integrate and configure the Deepseek API into the Ozeki AI Server, allowing your chatbot or application to communicate directly with Deepseek AI.
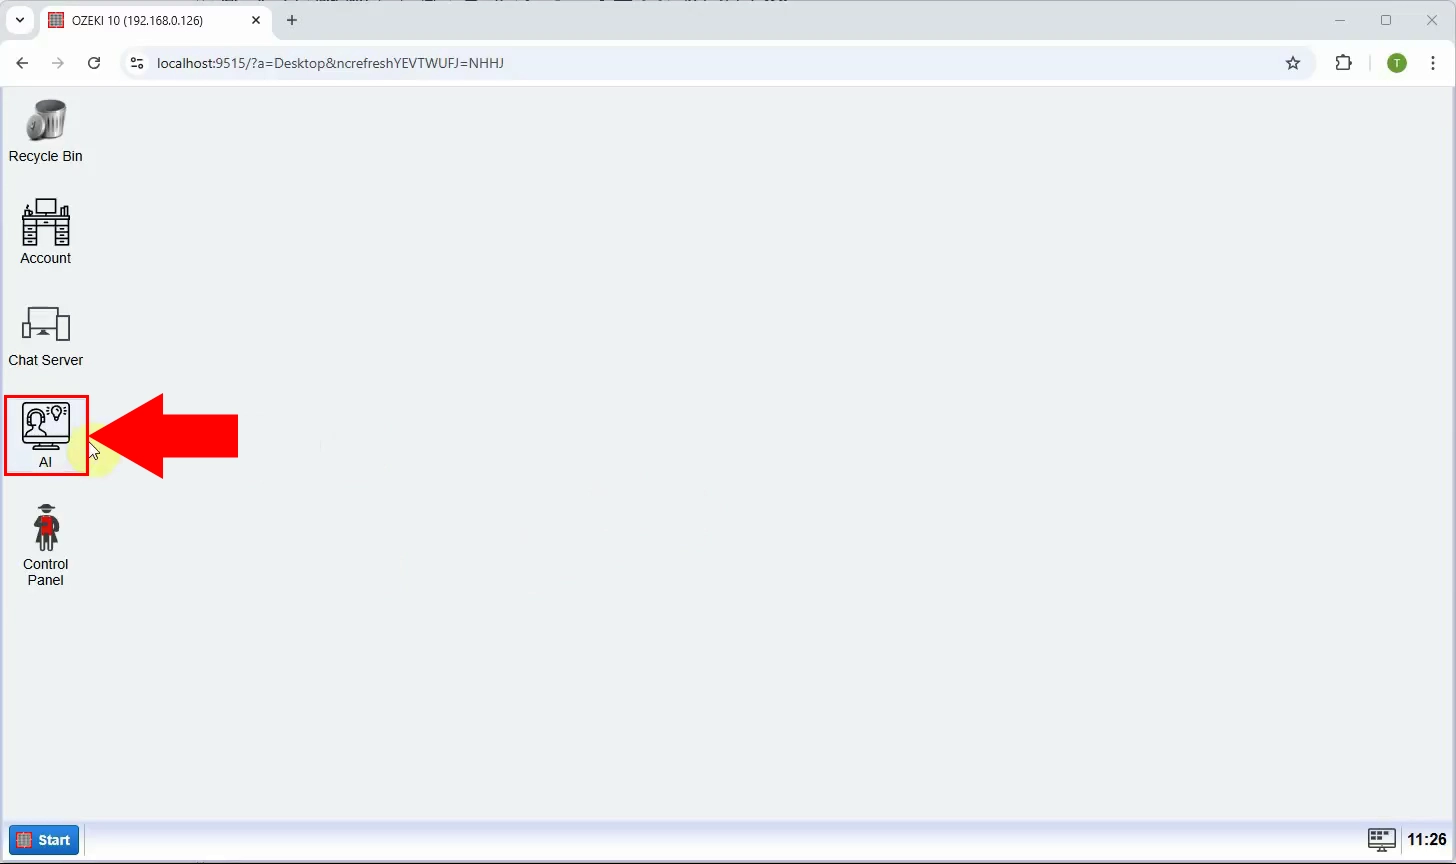
Step 12 - Open Ozeki AI Server
Launch the Ozeki AI Server application on your system to begin setting up the connection (Figure 12).
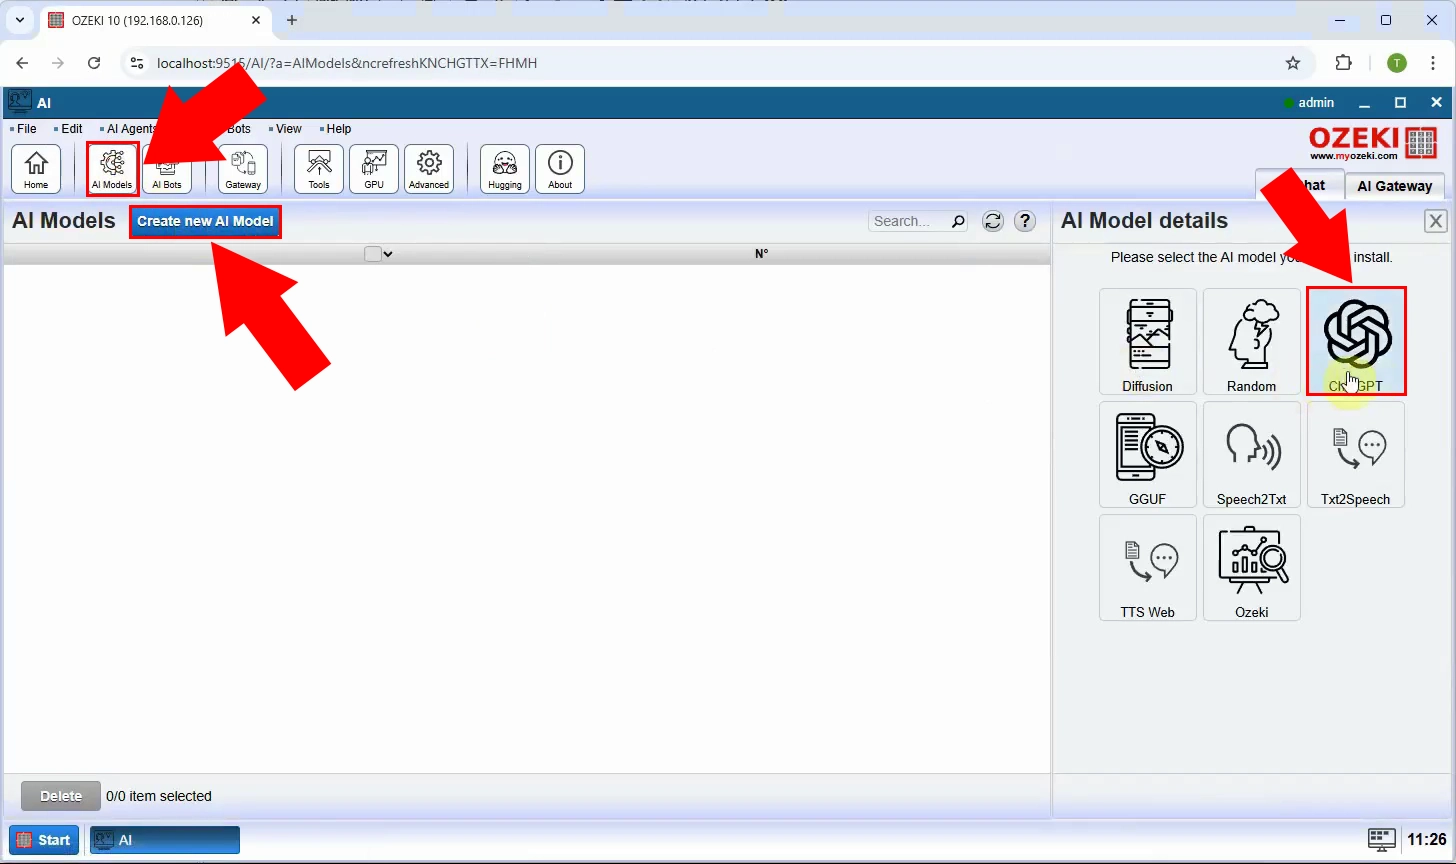
Step 13 - Create new Chat GPT model
The Ozeki AI Server interface is now displayed on the screen. Click on "AI Models" at the top of the interface. Then, select the blue "Create a New AI Model" button. On the right side, you will find multiple options, choose the "ChatGPT" menu (Figure 13).
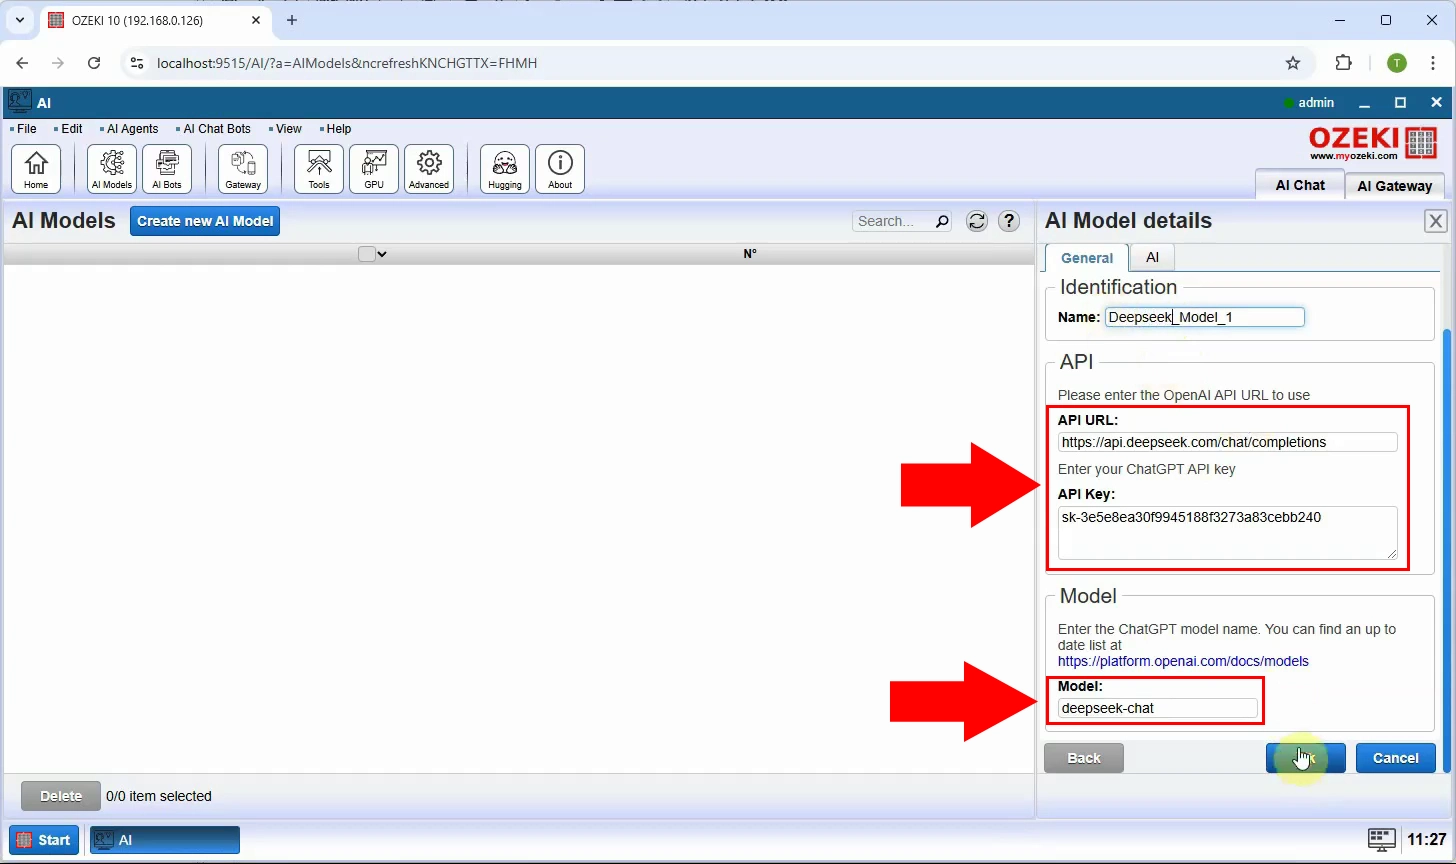
Step 14 - Configure API details
After selecting the "ChatGPT" menu, navigate to the "General" tab. In this section set the "API URL", "API Key", "Model" fields, to create a connection between Ozeki AI Server and ChatGPT. When done, click "OK" to save the settings (Figure 14).
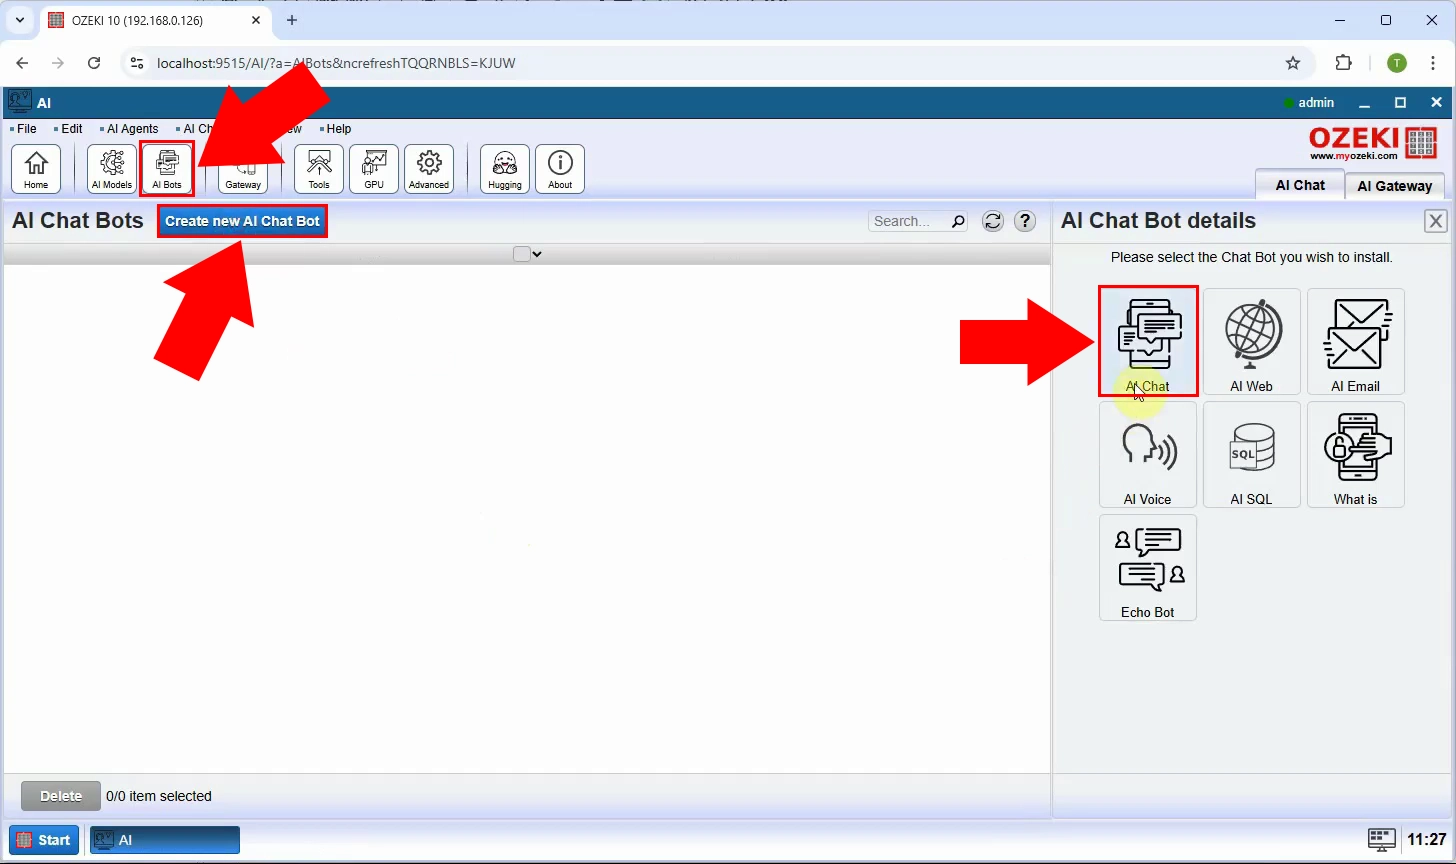
Step 15 - Create new AI chat bot
At the top of the screen, select "AI bots". Press the blue "Create new AI Chat Bot" button, then select "AI Chat" on the right (Figure 15).
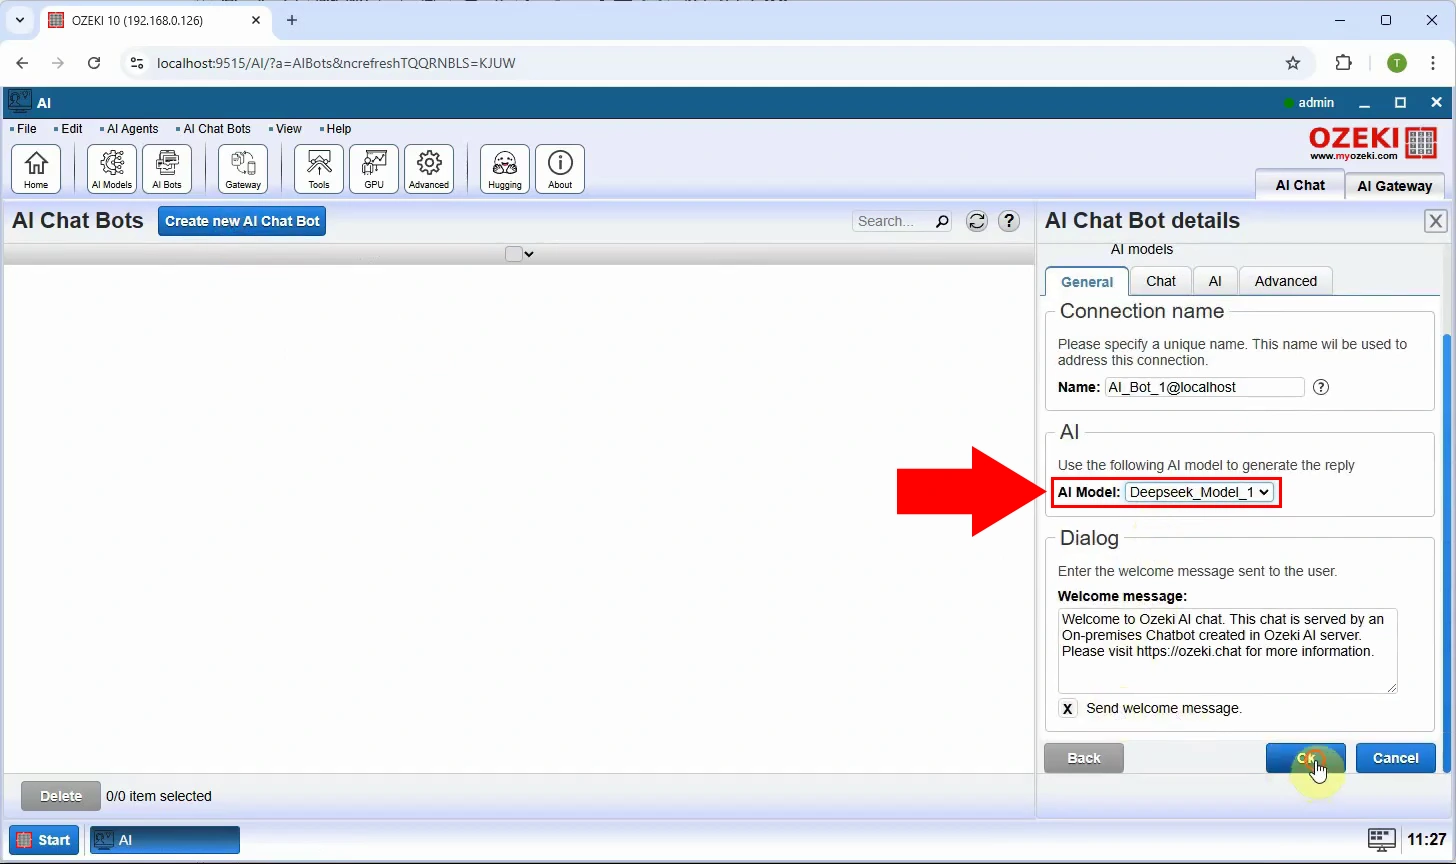
Step 16 - Select model
Then at "AI Model" select the already created "Deepseek_Model_1" and press "Ok" (Figure 16).
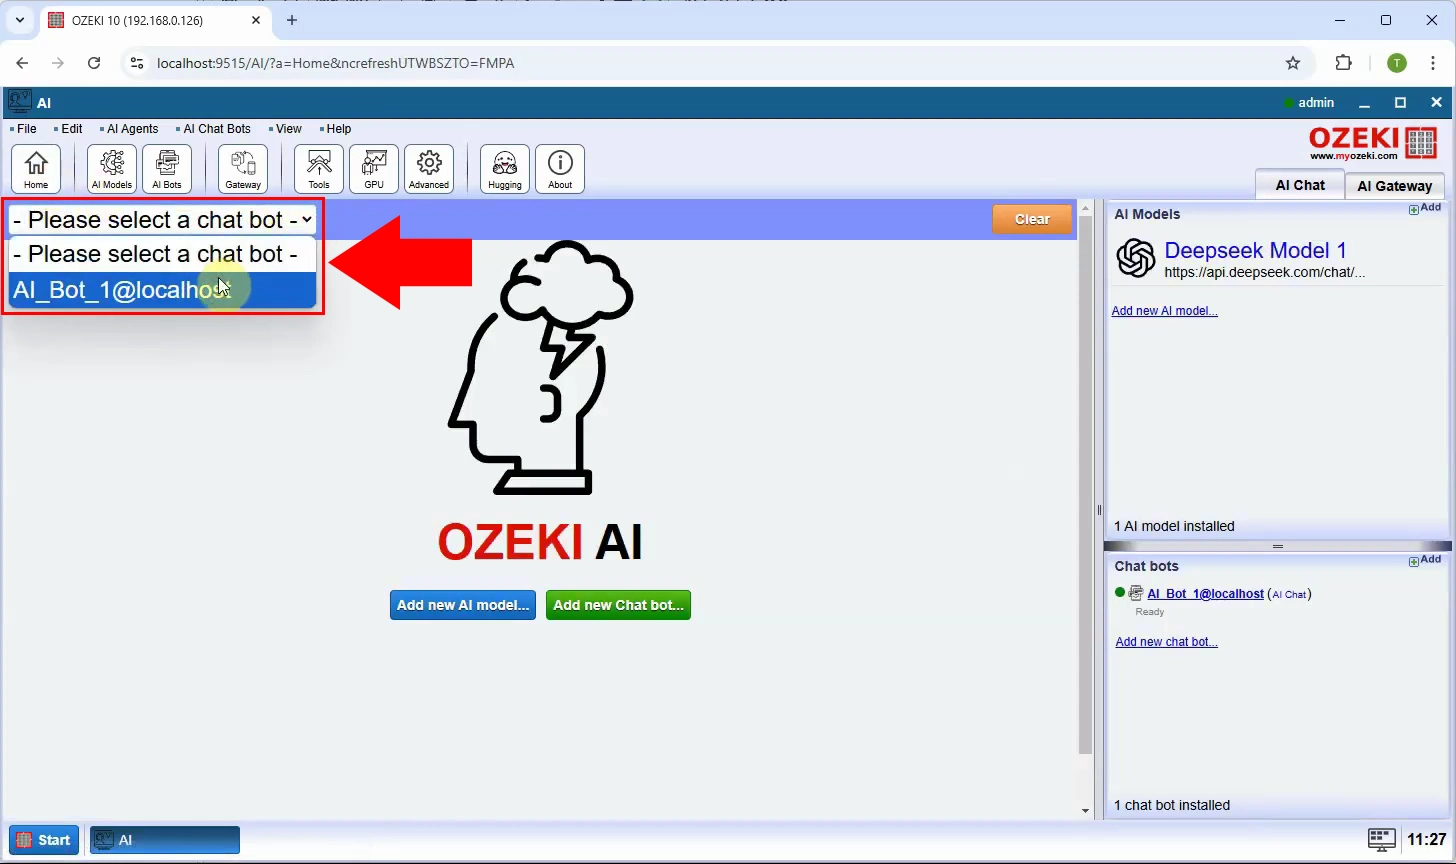
Step 17 - Select conversation
Set the status of the stick to green, turn it on. Then, on the "Home" page, select the created bot "AI_Bot_1" (Figure 17).
Step 18 - Conversation with Deepseek AI
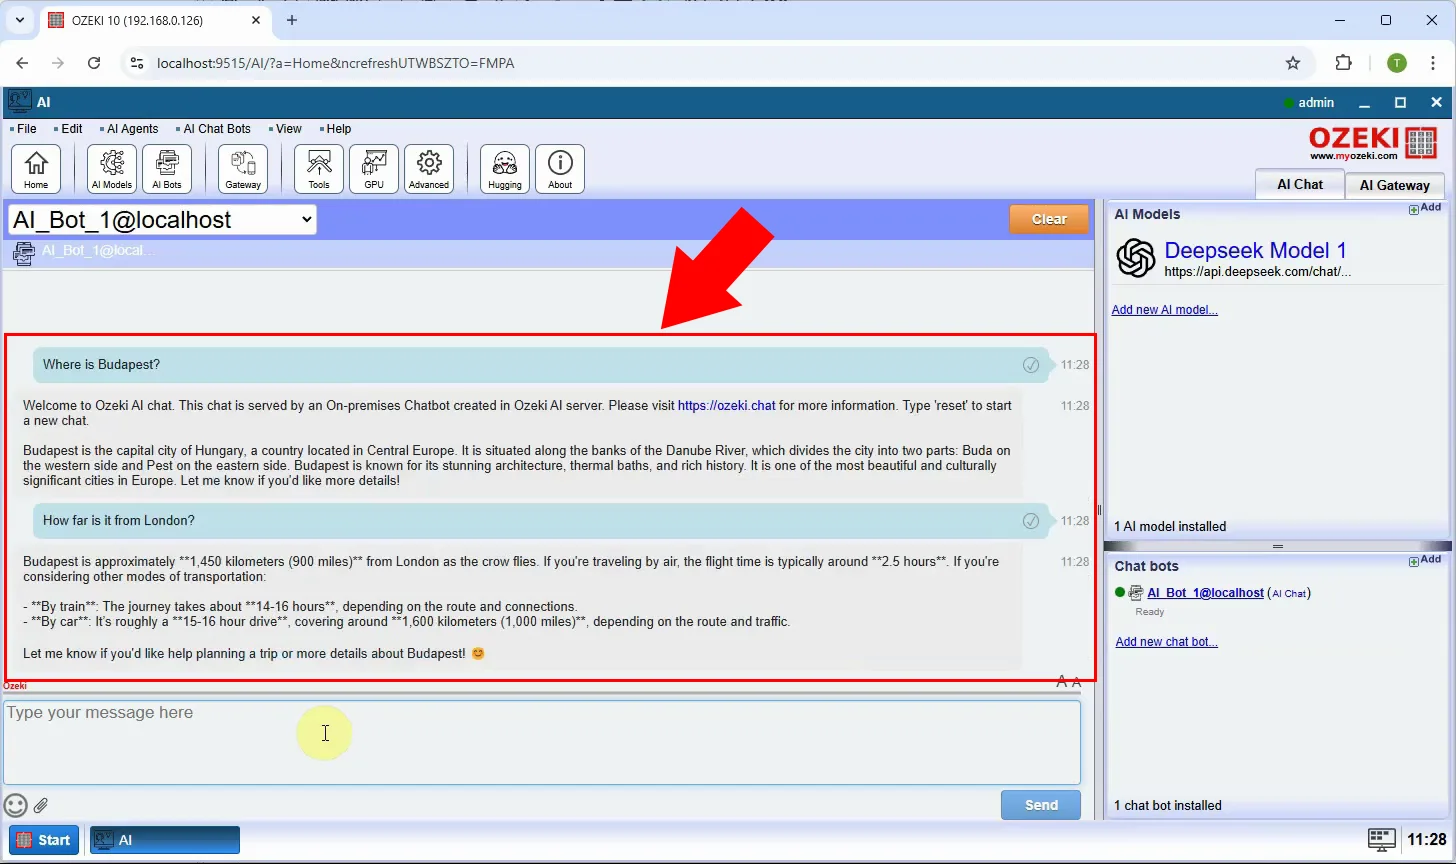
Begin interacting with the chatbot. Your prompts will now be processed through the Deepseek AI API, allowing for real-time, intelligent conversation (Figure 18).
